Build and present your AIoT mini-product
Module 5 — Capstone: AIoT Mini-Product · Slides: slides.md · Module overview · Course page
Fill the five “team writes this” spots of the starter with your own problem, test the threshold by hand and with the network cut, then present your mini-product in 10 minutes against a pass / not-yet checklist.
Objectives
Section titled “Objectives”By the end of this lesson you will be able to:
- Replace the five “team writes this” spots in s12_capstone_starter.py with your team’s problem (read_value, on_state_change, your widgets, the schema and the offline behaviour) while the file still runs the full Sense → Decide → Show → Send loop for at least 10 minutes
- Test the alert threshold by hand and with the network cut, and explain how confirming several rounds, latching the state and a minimum gap between alerts each solve a different problem
- Present the work in 10 minutes in four parts (problem → architecture → live demo → limitations) and check yourself beforehand with the seven pass / not-yet criteria
Before you start
Section titled “Before you start”You must have your team’s five-box canvas and schema table from lesson 5.1, and know the starter’s five moves from lesson 5.2.
Have ready a WiFi network or hotspot the board can connect to, and a program to watch messages on the broker (such as MQTT Explorer).
Edit the practice file’s CONFIG block to your own first: a unique DEVICE_ID (such as nok4821, because the broker is public), WiFi, broker and a topic using the same code.
- Equipment: an Eva Kit or TESAIoT Dev Kit board with the BENTO MicroPython firmware installed, or the BENTO Emulator in BENTO IDE (the structure and screen can run on the Emulator, but testing thresholds by hand with a real sensor and showing a network cut needs a real board, because sensor values on the Emulator are simulated)
- Before this: Lesson 5.2 — The starter: Sense, Decide, Show, Send
Concepts
Section titled “Concepts”The starter is not a fill-in-the-blank puzzle — it is a complete, already-running loop. The logic inside it is just an example (measuring tilt angle). The team’s job is to replace it with your own problem at the five spots marked “the team writes this”, and the given screen is a checklist of what a control screen must have in full: a measured value with its range, state shown as lamps rather than coloured text, separate on and off buttons, and a confirmation box on any command that moves something real.
The finished example in the solution carries the scaffold-tilt-alarm problem all the way through. Sense remembers ten readings of the “starting pose” at startup,
then measures against that pose, and combines roll and pitch with the Pythagorean formula so a tilt in any direction is counted. Decide layers three mechanisms:
confirming 3 rounds (CONFIRM_N) to guard against a single jolt, latching the state (latched) until someone presses acknowledge, and a minimum gap
(ALERT_GAP_MS) to guard against rapid-fire alerts while the value oscillates around the threshold. The line beacon(True) lights the real LED and the on-screen lamp together,
so the screen can never say the lamp is on while the LED is actually off.
On the network side, send() returns False when the link drops, so the counter only counts messages that really went out. Once back online, it sends back,
and pressing acknowledge sends ack, so the receiving side never has to guess. All five buttons read from the same ui.poll(), and no widget
is created inside the loop — the confirmation box and its answer buttons are all created at the start and hidden.
The five-move order runs from most trustworthy to least: sensor → logic → screen → network, and surviving a dropped network is placed last,
because you must first know what can break. The file 06_sense_decide_act_report.py connects a full measure → decide → command something real → report loop
you can see with your own eyes, using two thresholds (open at 27.5, close at 26.5) to keep the on/off command from flip-flopping while the value sits right around the threshold.
Worked example
Section titled “Worked example”Start with 06_sense_decide_act_report.py to see the full four-stage loop run on screen, then try changing stage 1 to a different value without touching stages 2 to 4
(the challenge at the end of the file). Files 07 through 09 are extras for your team’s screen: an event log readable even photocopied in black and white with ui.SpanGroup,
setting the board’s date with ui.Calendar, and a multi-page screen a finger can swipe with Tileview.
| File | What this file teaches |
|---|---|
| examples/06_sense_decide_act_report.py | The full four-stage loop in one file |
| examples/07_spangroup_event_log.py | An event log on screen, still readable when photocopied in black and white |
| examples/08_calendar_sets_the_clock.py | The board does not know what today’s date is — so who tells it |
| examples/09_tileview_swipe_only.py | A screen a finger can navigate, but the program cannot |
Screens from the BENTO Emulator for this lesson’s examples (click a file name to open the code)
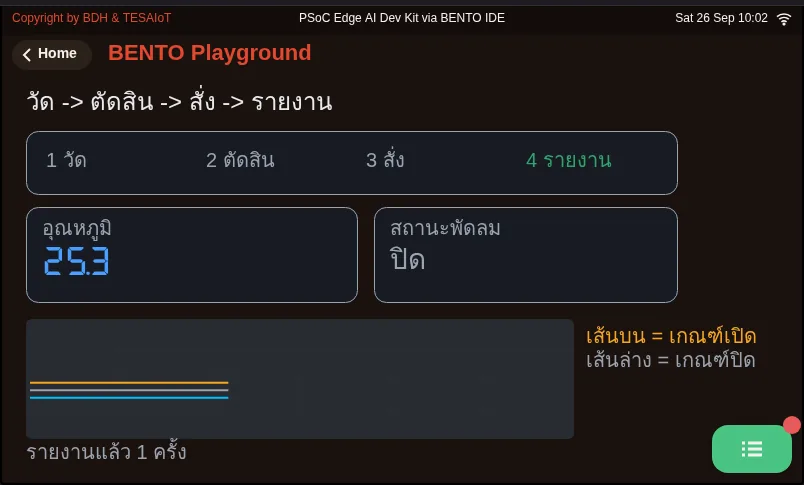
06_sense_decide_act_report.py The full four-stage loop in one file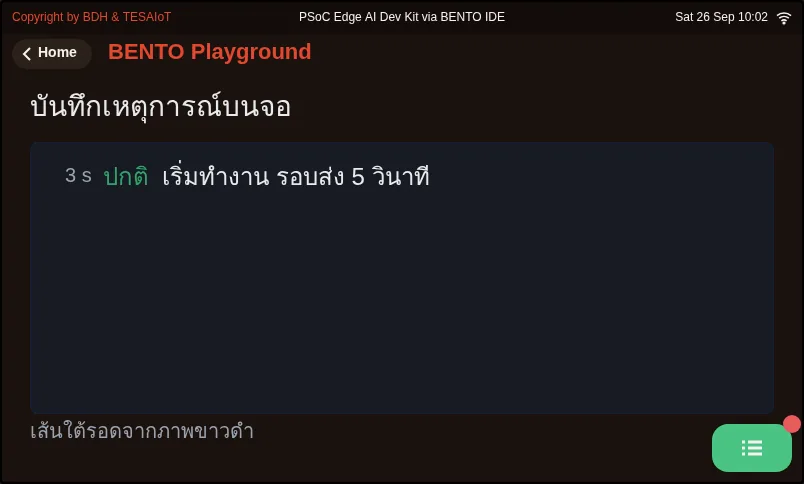
07_spangroup_event_log.py An event log on screen, still readable when photocopied in black and white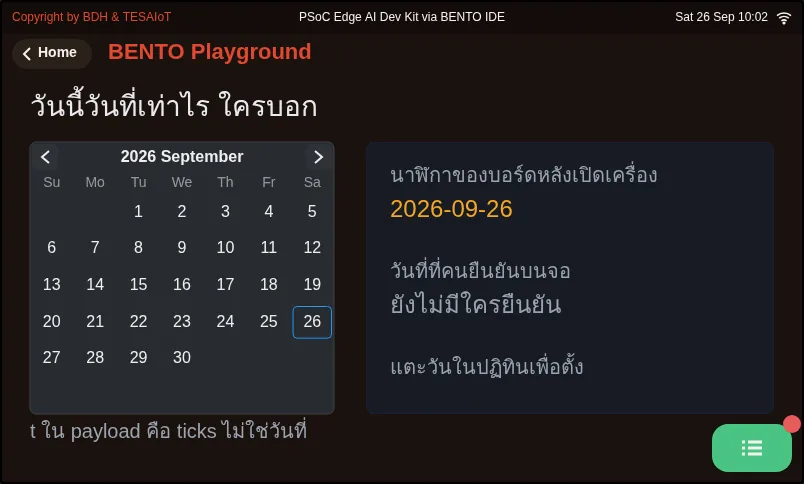
08_calendar_sets_the_clock.py The board does not know what today's date is — so who tells it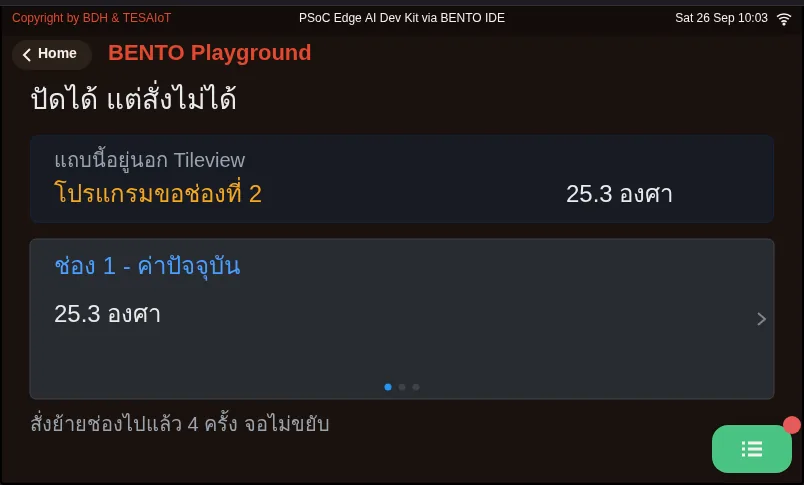
09_tileview_swipe_only.py A screen a finger can navigate, but the program cannotPractice
Section titled “Practice”The practice file runs even before anything is changed. Recommended order: one, run the bare starter successfully first. Two, change read_value() to your team’s own.
Three, set the threshold in CONFIG and test by hand that it alerts when it should. Four, dress up the screen. Five, adjust the schema.
Six, test with the network cut. Never skip step three — a threshold never tested by hand is a hope, not a threshold.
| Practice file | Topic |
|---|---|
| practice/s12_capstone_starter.py | A mini-product starter structure: Sense -> Decide -> Show -> Send |
Solution
Section titled “Solution”Open the solution after trying on your own at least once, and read how to use the solutions first.
| Solution | Goes with |
|---|---|
| solution/s12_capstone_starter.py | practice/s12_capstone_starter.py |
Check your understanding
Section titled “Check your understanding”The same questions are in quiz.yaml for automatic marking.
-
Order the recommended steps for working with the practice file. (order · objective 1)
- A) Set the threshold in CONFIG and test by hand that it alerts when it should
- B) Run the bare starter successfully first
- C) Test with the network cut
- D) Change read_value() to the team’s own quantity
- E) Dress up the screen, then adjust the schema
Solution
B → D → A → E → C — Start from a structure that already runs, then change the measured value, set and hand-test the threshold, dress up the screen and schema, and test the network drop as the last step. Testing the threshold by hand must never be skipped, or you will find out during the presentation that it does not alert.
-
A team put its confirmation question inside a ui.MsgBox button, but pressing it does nothing. What should they do? (choose one · objective 1)
- A) Create a new ui.MsgBox every time in the loop, so the button responds
- B) Use two real ui.Buttons as the answer, created at the start and .hide()den, then .show()n when asking
- C) Add time.sleep_ms(2000) after ui.poll() to give the button time to send its event
- D) Make the text in the box longer so the button becomes pressable
Solution
B — A button built into MsgBox does not send an event Python can see. Use a real ui.Button as the answer instead, and create everything before entering the loop, because creating a widget while someone is waiting for an answer adds delay at the worst possible moment.
-
In the solution, why must a value stay over the threshold for 3 rounds in a row (CONFIRM_N) before the state changes to ALERT? (choose one · objective 2)
- A) To guard against a single jolt, such as someone bumping into it, while still responding within about six-tenths of a second at a 200 ms loop
- B) Because the broker only accepts a message every 3 rounds
- C) To average the value with the gyro across all three axes
- D) To cut ui.poll()’s workload down to a third
Solution
A — 3 rounds × 200 ms is about 0.6 seconds, long enough that a real event is still ongoing, but short enough not to feel slow. The minimum gap and the latched state solve different problems.
-
Which pairs correctly match a mechanism in the solution with the problem it solves? Choose every correct one. (choose all that apply · objective 2)
- A) ALERT_GAP_MS — guards against rapid-fire alerts while the value oscillates around the threshold
- B) latched — holds the state until someone presses acknowledge, because an event nobody sees is the same as one that never happened
- C) beacon(True) — lights the real LED and the on-screen lamp from one line, so the screen can never say the lamp is on while the LED is off
- D) counting sent on every call to send(), because send() always succeeds
Solution
A, B, C — send() returns False when the link drops, so the solution only counts messages that really went out — the number on screen must never lie. The first three are each mechanism’s reason, exactly as the slides explain.
-
In the 10-minute presentation, which of these passes the “knows its own limitations” criterion? (choose one · objective 3)
- A) Say the system works in every case, with no limitations at all
- B) State at least 2 limitations with a technical reason for each, and say what would be done with two more weeks
- C) Play a pre-recorded video instead of a live demo, so the limitations never show
- D) Skip part 4 to finish on time
Solution
B — Part 4 is where the audience checks whether the team really understands its own work — it must never be skipped. Answering “no limitations” or dodging with a pre-recorded video both count as not-yet.
The capstone’s passing criteria (check yourself first; if learning in a group, have a classmate or your organiser check too)
- All five canvas boxes in your learning log are filled, and you can tell the problem in 30 seconds
- The board reads a sensor → decides → shows on screen in a full loop, running continuously for at least 10 minutes
- A message reaches the broker on the team’s topic, and can be shown to someone else in MQTT Explorer
- The payload is JSON following your team’s designed schema, with a unit and a device id
- Cutting the network still leaves the screen working, showing an offline status, and it reconnects itself once the network returns
- The screen passes the four control-panel rules: value with its range · state as lamps · separate on and off buttons · a confirmation box on any command that moves something real
- A 10-minute presentation covering all four parts, answering at least 2 questions about your own system’s limitations
Check the presentation against seven headings (pass or not-yet): a clear problem · a readable architecture · a sensible schema · a successful live demo · failure tested · knows its own limitations · on time. Rehearse it once for another team, then have them tell back what they understood your team did.
Going further
Section titled “Going further”After finishing the course, pick one path and record it in your learning log: move the work to send over encrypted TLS with tesaiot.connect() (lessons 4.7–4.9);
let a field technician set up WiFi themselves through wifi.softap() and tesaiot.config_set(); make the device last for months; or design a topic
for fifty devices. More applied examples live in shared/usecase.
This is the final lesson of the course. Go back to the course page to see where to go next.
Reflect
Section titled “Reflect”- If your team had two more weeks, which limitation would you fix first, and why?
- When the network drops, did your team choose “drop” or “keep for later”, and what does the person using the data at the destination gain or lose from that choice?
- Which part of the code could the team swap in a different problem without touching anything else, and which part is still tied together?
Review questions
Answer on your own first, then open the answer.
-
Put the recommended working order for the practice file in sequence. (Objective 1)
- ตั้งเกณฑ์ใน CONFIG แล้วทดสอบด้วยมือจริงว่ามันเตือนตอนที่ควรเตือน
- รันโครงเปล่าให้ผ่านก่อน
- ทดสอบตอนเน็ตหลุด
- เปลี่ยน read_value() เป็นปริมาณของทีม
- แต่งหน้าจอ แล้วปรับ schema
Show answer
Correct order: B. รันโครงเปล่าให้ผ่านก่อน → D. เปลี่ยน read_value() เป็นปริมาณของทีม → A. ตั้งเกณฑ์ใน CONFIG แล้วทดสอบด้วยมือจริงว่ามันเตือนตอนที่ควรเตือน → E. แต่งหน้าจอ แล้วปรับ schema → C. ทดสอบตอนเน็ตหลุด
เริ่มจากโครงที่รันได้ก่อน แล้วค่อยเปลี่ยนค่าที่วัด ตั้งและทดสอบเกณฑ์ด้วยมือ แต่งหน้าจอกับ schema และทดสอบเน็ตหลุดเป็นขั้นสุดท้าย การทดสอบเกณฑ์ด้วยมือห้ามข้าม ไม่งั้นจะไปเจอตอนนำเสนอว่ามันไม่เตือน
-
A team put the confirm answers in the ui.MsgBox buttons, but tapping them does nothing. What should they do? (Objective 1)
- สร้าง ui.MsgBox ใหม่ทุกครั้งในลูป เพื่อให้ปุ่มตอบ
- ใช้ ui.Button จริงสองตัวเป็นคำตอบ สร้างไว้ตั้งแต่ต้นแล้ว .hide() และ .show() ตอนถาม
- เพิ่ม time.sleep_ms(2000) หลัง ui.poll() ให้ปุ่มมีเวลาส่งเหตุการณ์
- เขียนข้อความในกล่องให้ยาวขึ้น ปุ่มจึงจะกดได้
Show answer
Answer: B. ใช้ ui.Button จริงสองตัวเป็นคำตอบ สร้างไว้ตั้งแต่ต้นแล้ว .hide() และ .show() ตอนถาม
ปุ่มในตัว MsgBox ยังไม่ส่งเหตุการณ์กลับมาให้ Python เห็น จึงใช้ ui.Button จริงเป็นคำตอบ และสร้างของทั้งหมดไว้ก่อนเข้าลูป เพราะการสร้าง widget ตอนคนกำลังรอคำตอบเพิ่มความหน่วงในจังหวะที่แย่ที่สุด
-
In the solution, why must the value exceed the threshold 3 rounds in a row (CONFIRM_N) before the state becomes ALERT? (Objective 2)
- กันการสั่นวูบเดียว เช่นตอนมีคนเดินชน โดยยังตอบสนองภายในราวหกในสิบวินาทีที่ลูป 200 ms
- เพราะ broker รับข้อความได้ทุก 3 รอบเท่านั้น
- เพื่อให้เฉลี่ยค่ากับ gyro ให้ครบสามแกน
- เพื่อลดงานของ ui.poll() ลงเหลือหนึ่งในสาม
Show answer
Answer: A. กันการสั่นวูบเดียว เช่นตอนมีคนเดินชน โดยยังตอบสนองภายในราวหกในสิบวินาทีที่ลูป 200 ms
3 รอบ × 200 ms คือราว 0.6 วินาที นานพอให้ของจริงยังเกินอยู่ แต่สั้นพอที่จะไม่ช้า ส่วนการเว้นระยะขั้นต่ำกับการค้างสถานะแก้คนละปัญหา
-
Which pairs of mechanism and the problem it solves are correct? Choose all that apply. (Objective 2)
- ALERT_GAP_MS — กันการเตือนรัวตอนค่าแกว่งรอบเกณฑ์
- latched — ค้างสถานะไว้จนมีคนกดรับทราบ เพราะเหตุการณ์ที่ไม่มีใครเห็นเท่ากับไม่เคยเกิด
- beacon(True) — จุดหลอดจริงและไฟบนจอจากบรรทัดเดียว จอจึงไม่บอกว่าไฟติดทั้งที่หลอดดับ
- นับ sent ทุกรอบที่เรียก send() เพราะ send() สำเร็จเสมอ
Show answer
Answer: A. ALERT_GAP_MS — กันการเตือนรัวตอนค่าแกว่งรอบเกณฑ์ · B. latched — ค้างสถานะไว้จนมีคนกดรับทราบ เพราะเหตุการณ์ที่ไม่มีใครเห็นเท่ากับไม่เคยเกิด · C. beacon(True) — จุดหลอดจริงและไฟบนจอจากบรรทัดเดียว จอจึงไม่บอกว่าไฟติดทั้งที่หลอดดับ
send() คืน False เมื่อสายหลุด เฉลยจึงนับ sent เฉพาะใบที่ออกไปจริง ตัวเลขบนจอต้องไม่โกหก ส่วนสามข้อแรกคือเหตุผลของแต่ละกลไกตามที่สไลด์อธิบาย
-
In the 10-minute presentation, which answer passes the "knows its own limits" criterion? (Objective 3)
- บอกว่าระบบใช้งานได้ทุกกรณี ไม่มีข้อจำกัด
- บอกข้อจำกัดได้อย่างน้อย 2 ข้อ พร้อมเหตุผลเชิงเทคนิค และบอกว่าถ้ามีเวลาอีกสองสัปดาห์จะทำอะไร
- ฉายวิดีโอที่อัดไว้แทน demo สด เพื่อไม่ให้เห็นข้อจำกัด
- ข้ามช่วงที่ 4 เพื่อให้จบทันเวลา
Show answer
Answer: B. บอกข้อจำกัดได้อย่างน้อย 2 ข้อ พร้อมเหตุผลเชิงเทคนิค และบอกว่าถ้ามีเวลาอีกสองสัปดาห์จะทำอะไร
ช่วงที่ 4 คือช่วงที่ผู้ฟังดูว่าทีมเข้าใจงานตัวเองจริงไหม ห้ามข้าม การตอบว่า "ไม่มีข้อจำกัด" หรือหลบด้วยวิดีโอที่อัดไว้คือยังไม่ผ่าน
Cite this lesson
If you teach from this lesson or reuse it in slides or documents, credit it with the text below. If you changed it, add (adapted) after the title.
"Build and present your AIoT mini-product" from TESA Open Knowledge by the Thai Embedded Systems Association (TESA), https://github.com/tesaiot/tesa-qualification-program, licensed under CC BY-NC 4.0
Thai attribution: "สร้างและนำเสนอ AIoT mini-product" จาก TESA Open Knowledge โดยสมาคมสมองกลฝังตัวไทย (Thai Embedded Systems Association: TESA) https://github.com/tesaiot/tesa-qualification-program สัญญาอนุญาต CC BY-NC 4.0
Lesson link: https://tesaiot.github.io/tesa-qualification-program/en/courses/aiot-micropython/m05-capstone/l03-build-and-present/
This lesson adapts the source below; keep its credit too.
https://github.com/Advance-Innovation-Centre-AIC/embedded-systems-for-aiot-developer/blob/a80bbe88a34bcb9bb8d991f42f9252b77cdab079/session-12.html (slides 35–58)
TESA Open Knowledge · © 2026 สมาคมสมองกลฝังตัวไทย (TESA) · CC BY-NC 4.0
Content is licensed CC BY-NC 4.0. Reuse it non-commercially and credit the Thai Embedded Systems Association (TESA) every time. · How to cite TESA