ModusToolbox™ and VS Code: Create, Build, Flash, Debug
Companion videos
Watch on YouTube (opens in a new tab)
-
 Download (from TESA Developer Hub), Build and Program via ModusToolbox to TESAIoT Dev Kit Thai Embedded Systems Association (TESA)
 -
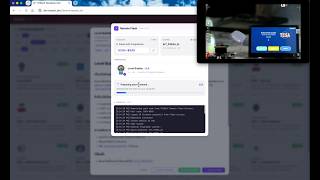 Remote Flashing for PSoC Edge AI Kit via TESA Developer Hub Thai Embedded Systems Association (TESA)
Videos by Thai Embedded Systems Association (TESA) · The whole series in the playlist AIoT Foundation
Course 1 · Module 2 Suggested time: about 2.5–3 hours (installing tools + creating a project + build / flash / debug) Format: a hands-on lesson — uses a real development machine and board
Lab · Cheatsheet · ← Table of Contents · ← M01 · M03 →
If you plan to build from open source (checked on 2026-09-26): the tesaiot-pse84-devkit-sdk README (commit
ef72c1b) pins ModusToolbox™ to 3.6 only, with the Arm GCC 14.2.1 that ships with ModusToolbox, building withmake buildand flashing withmake program. The firmware used in modules 3–8 of this course is distributed as ready-made HEX and is not yet open source. See the note in the Module 3 lesson and on the course page
Objectives (Learning Outcomes)
Section titled “Objectives (Learning Outcomes)”By the end of this lesson you should be able to:
- Explain the role of ModusToolbox™ in creating and managing firmware projects on PSOC™ Edge
- Set up the Environment / Toolchain needed to build on your machine
- Use Visual Studio Code together with the ModusToolbox™ ecosystem to edit code, Build, and Debug
- Manage Project Configuration, Device / BSP Selection and Library Management at a practical level
- Connect the tools to real hardware to Flash and Debug until an example program runs
This module takes you from the architecture map in M01 to a real workflow: creating a project on the kit’s BSP, calling the SDK layers, and seeing code run on the board.
A note on versions Infineon’s manuals for PSOC™ Edge (such as the PSOC™ Edge quick start guide) usually recommend ModusToolbox™ tools 3.6 or newer. Treat the version your own lab pack specifies as authoritative; if it differs from the numbers in this lesson, follow the lab pack.
Read alongside this chapter
Section titled “Read alongside this chapter”| Document | Use when |
|---|---|
| ModusToolbox™ software installation guide | Installing for the first time on Windows / Linux / macOS |
| PSOC™ Edge quick start guide | Checking the packages you should install for Edge |
| AN235935 — Getting started with PSOC™ Edge on ModusToolbox™ | An overview of the tool architecture + the Hello World path |
| Visual Studio Code for ModusToolbox™ user guide (PDF) | Opening a project in VS Code, build / program / debug |
| ModusToolbox™ tools package user guide | Project Creator, Library Manager, configurators, the overall flow |
| mtb-example-psoc-edge-hello-world | Infineon’s own Hello World example (tools 3.6+) — extra reference |
| TESAIoT Developer Hub | The course’s main example library — Example Explorer, Code Editor, flowcharts, API Reference |
| Bitstream Studio | A host / Digital Twin inside VS Code — Sensor Telemetry, Sensor Studio, connecting to a board or Simulator |
| TESAIoT_Hackathon | The lab pack — HEX firmware, VSIX, the TESAIoT Flasher, web-app / BLE demos for flashing and practice |
1. Why Two Tools: ModusToolbox™ and VS Code
Section titled “1. Why Two Tools: ModusToolbox™ and VS Code”From M01 we already know that the TESA Firmware SDK is the set of libraries/APIs an app calls, while the development tools are a separate layer.
| Tool | Main role in this course | Read more |
|---|---|---|
| ModusToolbox™ | Installs the toolchain, creates projects from a BSP/template, manages libraries, opens configurators | Tools package user guide |
| Visual Studio Code | Writing code, IntelliSense, build/debug through the workflow ModusToolbox™ supports | VS Code for ModusToolbox™ |
| KitProg3 / OpenOCD (on the kit) | Flashing and debugging on real hardware | The Programming section of AN235935 |
Key phrase ModusToolbox™ creates projects and manages the toolchain/libraries — VS Code writes code and debugs — the SDK is the API the app calls.
Infineon supports several IDEs, including Eclipse, VS Code, IAR Embedded Workbench and Arm® MDK (µVision), plus CLI-based work. See the overview in AN235935 and the tools package user guide
This course focuses on the pairing of ModusToolbox™ + VS Code, because it is a common approach in modern learning and development teams, and has clear dedicated documentation.
2. ModusToolbox™ for Creating Firmware Projects
Section titled “2. ModusToolbox™ for Creating Firmware Projects”2.1 What ModusToolbox™ Is
Section titled “2.1 What ModusToolbox™ Is”ModusToolbox™ is not just an IDE installer, but a set of tools + libraries + a build system for developing apps on Infineon MCUs, including the PSOC™ Edge family.
Components you will use often in this course:
| Component | What it’s for | Read more |
|---|---|---|
| Setup / tools package | Installing base tools, GCC, programming tools | Installation guide |
| Dashboard | A starting point for opening tools and creating projects | Linked from the Setup / docs of the installed version |
| Project Creator | Creating an app from a BSP + code example / template | Tools package user guide — Project Creator |
| Library Manager | Adding, removing, updating a project’s libraries | The Library management section of AN235935 |
| Device Configurator | Setting up pins, clocks, peripherals, then generating config code | The Device Configurator guide in the tools package + make device-configurator |
Build system (make) |
Compiling / programming / opening tools through standard recipes | Tools package user guide |
The product page and the main download point: ModusToolbox™
The Setup program is usually downloaded through the Infineon Development Center / Software Tools (the link in the VS Code user guide PDF points to softwaretools.infineon.com)
2.2 Recommended Install Set for PSOC™ Edge
Section titled “2.2 Recommended Install Set for PSOC™ Edge”Per the PSOC™ Edge quick start guide, in summary you should install at least:
- ModusToolbox™ Setup per the installation guide for your OS
- Arm® GNU Toolchain (GCC)
- The base tools package version that supports Edge (3.6+ per the quick start)
- An IDE of your choice — this course chooses VS Code (download VS Code if you don’t have it)
- The programming tools package, as offered by Setup
- (If needed) the Edge Protect Security Suite, or an ML pack such as DEEPCRAFT™ / the Machine Learning Pack — not required for the first Hello World
LLVM (optional) The quick start states that some work may need the LLVM Embedded Toolchain for Arm, which is not included in the standard Setup — install it additionally when your lab pack’s guide says to
Practical install tips (from Infineon installation guidance)
Section titled “Practical install tips (from Infineon installation guidance)”- Use the Setup program as the main method from version 3.2 onward, since it helps choose tools, IDE and toolchain as a set
- If creating an app or adding a library reports a missing package, go back and open Setup / install the missing package (Project Creator and Library Manager usually warn when an asset is missing)
- A network that blocks GitHub may affect pulling BSPs/libraries — see the proxy / manifest section of the installation guide and the Project Creator guide of the version installed
2.3 Creating a Project with Project Creator
Section titled “2.3 Creating a Project with Project Creator”Project Creator has both a GUI and a CLI, installed under ModusToolbox™’s tools folder (such as .../ModusToolbox/tools_<version>/project-creator).
Step-by-step detail is in the tools package user guide and the VS Code for ModusToolbox™ guide
The standard sequence:
- Open the ModusToolbox™ Dashboard, or open Project Creator directly
- Choose the Kit / BSP that matches the board in hand, such as the KIT_PSE84_EVAL family you have
- Choose a starting code example or template
- Course recommendation: open an example from the TESAIoT Developer Hub (filter by Board / Domain to match your kit), then download or open it per your lab pack’s guide
- A vendor alternative: Hello World for PSOC™ Edge, when you want to compare against Infineon’s raw example
- In the Target IDE, choose Visual Studio Code / Microsoft Visual Studio Code so the workspace file and related config are generated
- Give a destination folder, then let the tool clone the BSP/template and pull the needed libraries from the manifest
Expected result:
- A project structure ready for the
makesystem - The libraries/BSP already pulled in
- A
*.code-workspacefile for VS Code
The course’s example library: TESAIoT Developer Hub Infineon’s own combined example library (extra): Code Examples for ModusToolbox™ Software
2.4 Typical Application Structure (Mental Model)
Section titled “2.4 Typical Application Structure (Mental Model)”The real structure depends on the template, but the concept is usually similar:
my-app/ ├── *.code-workspace # opened with VS Code ├── Makefile / makefiles # ModusToolbox™'s build system ├── main.c / source/ # your app code ├── deps / libs / bsps ... # pulled-in libraries and BSP (folder names vary by version) ├── configs / design.modus # config from the Device Configurator (if any) └── build/ # build output (created when compiling)Professional practice
- Edit product code at the app layer; make a habit of not editing inside library folders
- Add/update dependencies through the Library Manager
- Commit only what the team agrees on (some teams don’t commit the whole
libsfolder — per team policy)
3. Environment and Toolchain
Section titled “3. Environment and Toolchain”3.1 What “Environment” Means Here
Section titled “3.1 What “Environment” Means Here”Before you can build, the machine needs at least:
| Component | What it’s for | Reference |
|---|---|---|
| ModusToolbox™ tools | Project Creator, Library Manager, make recipes, OpenOCD, etc. | Installation guide |
| Arm GNU Toolchain (GCC) | Compiling C code into a binary for Cortex-M | Edge quick start |
| VS Code + extensions | Editing and debugging | VS Code guide |
| USB access for KitProg | Letting the host see the debugger on the board | AN235935 — Programming and Debugging |
| A terminal emulator | Viewing UART logs from an example | The Hello World example’s README often recommends one, such as Tera Term |
| Bitstream Studio (recommended install) | A host app in VS Code — Sensor Telemetry / Sensor Studio / a digital twin connected to the board after flashing | Marketplace — TERNIONDEV.bitstream-studio |
| The TESAIoT_Hackathon pack | Ready-made HEX, the TESAIoT Flasher, a backup VSIX, web-app demos | github.com/drsanti/TESAIoT_Hackathon |
3.2 Path and Tool Discovery
Section titled “3.2 Path and Tool Discovery”ModusToolbox™’s build system expects to find the tools package at the standard install path. If it is installed in the wrong place, or several versions overlap, you often see:
makecannot find the compiler- The configurator won’t open
- Program/debug fails even though the board is plugged in
Basic troubleshooting steps:
- Reinstall or repair through the Setup / installation guide
- Open a terminal from the workflow the VS Code / tools package documentation recommends
- In the project folder, try a standard target, such as
make helpormake build(target names may differ by template — check the project’s Makefile)
3.3 Optional: J-Link Instead of On-board KitProg
Section titled “3.3 Optional: J-Link Instead of On-board KitProg”The Edge quick start states the SEGGER J-Link alternative:
- Install the J-Link software and note the path
- Edit the BSP file (such as
bsp.mk) and addBSP_PROGRAM_INTERFACE=JLink - If installed outside the standard path, add
MTB_JLINK_DIR=..., for example- Windows:
C:/Program Files/SEGGER/JLink_V852 - macOS:
/Applications/SEGGER/JLink_V852 - Linux:
/opt/SEGGER/JLink_V852
- Windows:
Most people use the on-board KitProg first — switch to J-Link only when needed.
4. Using VS Code with the SDK (Edit, Build, Debug)
Section titled “4. Using VS Code with the SDK (Edit, Build, Debug)”The main documentation for this section: Visual Studio Code for ModusToolbox™ user guide · PDF
4.1 Opening the Project
Section titled “4.1 Opening the Project”The standard sequence:
- Create a project with Project Creator, choosing VS Code as the target, or create one and obtain the workspace file
- Open VS Code by hand
- Open the
{project-name}.code-workspacefile in the project folder
Don’t just open a random subfolder and lose the task / launch configuration — open the workspace file the tool created for you. More detail is in the “Using the code example” section of several repos, such as the Hello World docs flow
4.2 Extensions and Assistant
Section titled “4.2 Extensions and Assistant”Infineon’s VS Code guide references:
- The ModusToolbox™ Assistant extension/workflow (depending on the version) to help create apps and open tools
- Cortex-Debug for extra Cortex-M debugging capability in VS Code
If your lab pack states a locked set of extensions — install per that list so you can:
- Create/open apps from VS Code
- Run build / program / debug configurations
- Open the Device Configurator and other tools from the helper panel
4.3 Build
Section titled “4.3 Build”Whether you press a button in VS Code or use a terminal, the same principle applies: it calls the project’s make system that ModusToolbox™ set up. See the build/program/debug overview in the tools package user guide
What to check when a build succeeds:
- No errors from the compiler / linker
- An output file exists in the
buildfolder as the template defines it - After changing the BSP/a library, it still builds again
4.4 Program vs Debug
Section titled “4.4 Program vs Debug”| Action | Meaning |
|---|---|
| Program / Flash | Writing firmware into the device’s memory |
| Debug | Usually includes programming, then halting at a breakpoint / stepping through code via GDB + OpenOCD or another probe |
AN235935 states that ModusToolbox™ supports an OpenOCD + GDB server, and probes such as KitProg3 or J-Link. For a standalone PSOC™ Programmer (program/erase/verify/read), see Infineon’s Programming tools documentation that comes with Setup.
5. Project Configuration, Device Selection, and Library Management
Section titled “5. Project Configuration, Device Selection, and Library Management”5.1 Device / BSP Selection
Section titled “5.1 Device / BSP Selection”The BSP (Board Support Package) tells the project:
- Which chip/board is being used
- How pins and on-board devices are mapped
- Which libraries must be pulled in at a minimum
Choosing the wrong BSP when creating a project = the code may still build, but the LED/UART pins won’t match the real thing.
A simple rule: choose the BSP that matches the kit plugged in. Reference kit examples: KIT_PSE84_EVAL · the PSOC™ Edge E84 page
An example Device Support Library on GitHub: mtb-dsl-pse8xxgp
5.2 Device Configurator
Section titled “5.2 Device Configurator”Open it from the IDE workflow, or from the project folder:
make device-configuratorPer the VS Code for ModusToolbox™ guide, it is used to:
- View/enable peripherals
- Set up pins, clocks, DMA, etc.
- Generate config code that links into the build
- Open other related configurators (such as CAPSENSE™, QSPI) that the BSP supports
Each resource you open usually has a link to related API documentation.
For PSOC™ Edge: setting up and initialising most peripherals is designed to be done through the configurator + PDL (review M01 §7–8). In M02, practise “opening and recording the config” before writing deeper Drivers in M03.
5.3 Library Manager
Section titled “5.3 Library Manager”The Library Manager helps you:
- Add middleware / libraries
- Remove unused ones
- Update versions per Infineon’s manifest on GitHub
Use it when you need an extra feature, such as retarget-io (UART printf), abstraction-rtos, connectivity — don’t copy libraries randomly from another project.
See the library management explanation in AN235935
5.4 Project Configuration Checklist
Section titled “5.4 Project Configuration Checklist”Before deciding the project is ready to keep developing:
- The BSP matches the kit
- It opens in VS Code through
.code-workspace - The build succeeds
- You know how to open the Device Configurator and the Library Manager
- You know which file/folder the app code is in
6. Flash and Debug on Real Hardware
Section titled “6. Flash and Debug on Real Hardware”6.1 Hardware Prerequisites
Section titled “6.1 Hardware Prerequisites”- The PSOC™ Edge kit you’re using (such as KIT_PSE84_EVAL)
- A USB cable that can power and talk to KitProg
- (If any) a UART port per the kit’s guide — some kits use USB-UART through KitProg
6.2 KitProg3 and fw-loader
Section titled “6.2 KitProg3 and fw-loader”Infineon kits usually have an on-board programmer called KitProg. ModusToolbox™ expects KitProg3 (CMSIS-DAP), which is faster than HID mode in many cases, as explained in the VS Code / tools guides.
If the kit is old, or the firmware doesn’t match:
- Use fw-loader, which ships with ModusToolbox™, to update KitProg
- On Linux, you may need to install udev rules before first using fw-loader
Read the KitProg section of the VS Code user guide PDF and AN235935 for details
6.3 Prebuilt HEX, Flasher, and Lab Pack
Section titled “6.3 Prebuilt HEX, Flasher, and Lab Pack”When choosing to use ready-made firmware (not building from source at that point), or when you need the matching flasher / VSIX installer, use the pack from:
| Folder in the repo | What it’s for |
|---|---|
hex/ |
The DevKit’s .hex files — flash before the hardware lab |
flasher/ |
The TESAIoT Flasher installer (Windows / macOS / Linux) |
vsix/ |
Bitstream Studio’s .vsix (an install alternative outside the Marketplace) |
web-app/ |
HTML telemetry examples for practice after connecting to the host |
Match the VSIX with the HEX version per the repo’s README recommendation (see the
latestentry in the firmware manifest, when present)
Other flashing options in this course: ModusToolbox™ Program from a project you build yourself (the previous section), or the TESAIoT Flasher + HEX from this repo.
6.4 First Success Criteria (Hello World Path)
Section titled “6.4 First Success Criteria (Hello World Path)”The minimum goal of M02:
- Build the example project successfully or successfully flash a HEX from the lab pack
- Successfully program the board
- See confirmable behaviour, such as a blinking LED, and/or a message on the serial terminal / telemetry in Bitstream Studio
- Open a debug session, at least halting at
mainor a simple breakpoint (when using the build-from-source path)
The course’s reference path (code examples): TESAIoT Developer Hub The lab-pack reference path (HEX / Flasher / demos): TESAIoT_Hackathon The vendor’s reference path (extra): mtb-example-psoc-edge-hello-world + the steps in AN235935
Once you meet this bar, you are ready for M03 to call the Driver API systematically.
6.5 Troubleshooting Quick Table
Section titled “6.5 Troubleshooting Quick Table”| Symptom | What to check | Read more |
|---|---|---|
| The board doesn’t appear / won’t program | The USB cable, port, KitProg3, drivers, try another port | KitProg / fw-loader in the VS Code guide · Hackathon troubleshooting |
| The build can’t find the toolchain | Install GCC/tools per Setup, open the correct terminal | Installation guide |
| The build succeeds but nothing happens on the board | The BSP doesn’t match the kit, it hasn’t been programmed yet, you’re watching the wrong LED/UART | Check the BSP against the kit’s page |
| Debug won’t connect | OpenOCD/KitProg, close programs holding the port, check the launch config | Cortex-Debug + the VS Code guide |
| No message over Serial | The baud rate, the COM port, the example has no retarget-io/UART yet | The code example’s README |
| Flashing the HEX gives no telemetry | The VSIX and HEX are mismatched versions, the baud isn’t 921600, you haven’t Linked in Bitstream Studio yet | The TESAIoT_Hackathon README |
7. How This Connects to TESA Firmware SDK
Section titled “7. How This Connects to TESA Firmware SDK”Once the project is ready, you are standing on the same stack you learned in M01:
VS Code (edit / build / debug) │ModusToolbox™ tools (create, libraries, configurators, OpenOCD) │Application → Utility / Driver API (the TESA Firmware SDK in this course) │BSP / PDL / HAL (Device Support) │PSOC™ Edge hardware- M02 makes you ready to create and run a project on real tools
- M03 will have you call the Driver API on that project, deliberately
Review the software layers: M01 — Software Ecosystem · Device Support Library (pse8xxgp)
8. Module Summary
Section titled “8. Module Summary”- ModusToolbox™ creates projects from a BSP/template and manages the toolchain / libraries / configurators
- The right environment = tools + GCC + VS Code + KitProg access
- Open the project through the
.code-workspace, then build/debug per the Infineon workflow - The BSP must match the kit; use the Device Configurator and Library Manager as the main path
- Flashing + debugging on real hardware is this module’s pass criterion
Next Steps
Section titled “Next Steps”- Do the hands-on exercise: Lab
- Keep the summary sheet: Cheatsheet
- When ready, continue to M03 — GPIO and Basic Peripherals (M03 lesson)
References and Further Reading
Section titled “References and Further Reading”Official Infineon documentation
Section titled “Official Infineon documentation”- ModusToolbox™ product page
- ModusToolbox™ software installation guide
- ModusToolbox™ tools package user guide (PDF)
- PSOC™ Edge quick start guide
- AN235935 — Getting started with PSOC™ Edge E8 MCU on ModusToolbox™ (PDF)
- Visual Studio Code for ModusToolbox™ user guide · PDF
- PSOC™ Edge E84 product page
- KIT_PSE84_EVAL evaluation kit
Code examples and libraries
Section titled “Code examples and libraries”- TESAIoT Developer Hub — Example Explorer, flowcharts, API Reference (the course’s main example source)
- mtb-example-psoc-edge-hello-world — an extra Infineon example
- Code Examples for ModusToolbox™ Software
- mtb-dsl-pse8xxgp (Device Support Library)
Related tools
Section titled “Related tools”- Visual Studio Code · Download · Docs
- Cortex-Debug extension (GitHub)
- SEGGER J-Link (optional probe)
- LLVM Embedded Toolchain for Arm (optional)
- OpenOCD / KitProg3, per your kit’s guide
Host application / Digital Twin
Section titled “Host application / Digital Twin”- Bitstream Studio — Visual Studio Marketplace (
TERNIONDEV.bitstream-studio) — a VS Code extension for Sensor Telemetry, Sensor Studio, a 3D digital twin, and a host connecting to firmware on TESAIoT / PSoC Edge (USB / Wi‑Fi / MQTT, or a Simulator)
Lab pack / flash / demos
Section titled “Lab pack / flash / demos”- TESAIoT_Hackathon (GitHub) — HEX firmware (
hex/), the TESAIoT Flasher (flasher/), VSIX (vsix/), web-app telemetry demos (web-app/) for hands-on practice
Check your understanding
Section titled “Check your understanding”Three short questions in quiz.yaml, one per objective of this lesson. Try answering them yourself first, then compare with the answer key and explanations in the file.
Continue hands-on at Lab: create, build, flash and debug a firmware project
Lab · Cheatsheet · ← Table of Contents · ← M01 · M03 →
Examples on the TESAIoT Developer Hub
Section titled “Examples on the TESAIoT Developer Hub”Try the real thing on the TESAIoT Dev Kit: open examples on the Developer Hub to read the code, download it, or flash ready-made firmware.
Review questions
Answer on your own first, then open the answer.
-
เครื่องมือใดทำหน้าที่ “สร้างโปรเจกต์จาก BSP/template และจัดการ toolchain / library” (Objective 1)
- VS Code
- KitProg3
- TESA Firmware SDK
- ModusToolbox™
Show answer
Answer: D. ModusToolbox™
Key phrase ของหัวข้อ 1: ModusToolbox™ สร้างโปรเจกต์และจัดการ toolchain/library, VS Code ใช้เขียนโค้ดและ debug, SDK คือ API ที่แอปเรียกใช้
-
ข้อใดเป็นเงื่อนไขที่บทเรียนย้ำว่า “ต้องตรง” ก่อนคาดหวังผลบนบอร์ด (Objective 2)
- ต้องใช้ J-Link แทน KitProg เสมอ
- BSP ต้องตรงกับคิตที่ใช้
- ต้องใช้ IAR Embedded Workbench
- ต้องติดตั้ง Blender
Show answer
Answer: B. BSP ต้องตรงกับคิตที่ใช้
Module Summary ข้อ 4: BSP ต้องตรงคิต และตาราง 6.5 ก็ชี้ว่า BSP ผิดคิตเป็นสาเหตุแรกของอาการ build ผ่านแต่บอร์ดเงียบ
-
Flash HEX แล้วแต่ไม่มี telemetry ใน Bitstream Studio ตารางในหัวข้อ 6.5 ชี้สาเหตุใด (Objective 3)
- ยังไม่ได้ติดตั้ง Arm MDK
- BSP มี LED มากเกินไป
- ต้องใช้ LLVM แทน GCC
- VSIX กับ HEX คนละเวอร์ชัน, baud ไม่ใช่ 921600 หรือยังไม่ Link
Show answer
Answer: D. VSIX กับ HEX คนละเวอร์ชัน, baud ไม่ใช่ 921600 หรือยังไม่ Link
แถวสุดท้ายของตาราง 6.5 Troubleshooting Quick Table
Cite this lesson
If you teach from this lesson or reuse it in slides or documents, credit it with the text below. If you changed it, add (adapted) after the title.
"ModusToolbox™ and VS Code: Create, Build, Flash, Debug" from TESA Open Knowledge by the Thai Embedded Systems Association (TESA), https://github.com/tesaiot/tesa-qualification-program, licensed under CC BY-NC 4.0
Thai attribution: "ModusToolbox™ และ VS Code: สร้าง build flash debug" จาก TESA Open Knowledge โดยสมาคมสมองกลฝังตัวไทย (Thai Embedded Systems Association: TESA) https://github.com/tesaiot/tesa-qualification-program สัญญาอนุญาต CC BY-NC 4.0
This lesson adapts the source below; keep its credit too.
https://github.com/drsanti/TESAIoT-Courses/blob/287c21814ba8c75f693136616dcd270349a15966/C1/M02/README.md · Original content by Asst. Prof. Dr. Santi Nuratch (ผศ.ดร.สันติ นุราช), KMUTT. Course 1 (C1/) of drsanti/TESAIoT-Courses. TESA funded the work and holds the rights; published here under CC BY-NC 4.0. The upstream repository carries no licence file. Text kept faithful; structure, front matter, quizzes and notes added by TESA Open Knowledge.
TESA Open Knowledge · © 2026 สมาคมสมองกลฝังตัวไทย (TESA) · CC BY-NC 4.0
Content is licensed CC BY-NC 4.0. Reuse it non-commercially and credit the Thai Embedded Systems Association (TESA) every time. · How to cite TESA