Lab: Create, Build, Flash, and Debug a Firmware Project
Companion videos
Watch on YouTube (opens in a new tab)
-
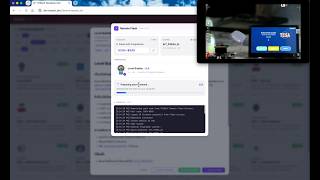 Remote Flashing for PSoC Edge AI Kit via TESA Developer Hub Thai Embedded Systems Association (TESA)
Videos by Thai Embedded Systems Association (TESA) · The whole series in the playlist AIoT Foundation
Course 1 · Module 2 Type: Hands-on lab (requires PC tools + board) Suggested time: 90–120 minutes
Read first: Lesson · Cheatsheet · ← Table of Contents · ← M01 · M03 →
Lab Goals
Section titled “Lab Goals”Once complete, you will:
- Have the ModusToolbox™ + VS Code environment installed/checked and ready
- Create a project from the BSP of the kit in hand
- Build successfully in VS Code or a terminal
- Flash and confirm the result on the real board
- Open a debug session at least once
Prerequisites
Section titled “Prerequisites”- Have finished reading the lesson
- The machine is installed per the lesson’s list (or per your lab pack’s guide)
- A PSOC™ Edge board + a USB cable
- Know the code/name of the kit used to pick the BSP
After a successful flash — watch telemetry on the host Install Bitstream Studio from the Marketplace (or from
vsix/in the lab pack), then use the Command Palette → Bitstream Studio: Open Bitstream Studio / Start Serial BridgeThe HEX / Flasher / demos pack: TESAIoT_Hackathon — clone or download the ZIP, then use
hex/+flasher/per the repo’s README (match versions with the VSIX)
Part 1 — Environment Check
Section titled “Part 1 — Environment Check”Record the result in your notes:
| Item | Present? | Notes |
|---|---|---|
| ModusToolbox™ tools (state the version) | ||
| Arm GNU Toolchain (GCC) | ||
| VS Code | ||
| The extensions your lab pack requires | ||
| A terminal emulator (if you need to watch UART) |
Pass when: you have checked all the above and the machine is ready, or you can create a new project in Part 2
Part 2 — Create a Project
Section titled “Part 2 — Create a Project”- Open the ModusToolbox™ Dashboard or Project Creator
- Choose the BSP/Kit that matches the board in hand
- Choose a starting example
- Recommended: open one from the TESAIoT Developer Hub (Example Explorer → filter by Board to match your kit)
- Or Infineon’s Hello World, if you choose that path
- Choose VS Code as the target
- Create the project into a neatly named folder (avoid a path with unusual spaces, if possible)
Record:
- Project name: _______________
- BSP chosen: _______________
- Folder path: _______________
Pass when: a .code-workspace file exists in the project
Part 3 — Open in VS Code and Build
Section titled “Part 3 — Open in VS Code and Build”- Open the
*.code-workspacefile with VS Code - Run a build per your chosen workflow (a button in the IDE, or
makein the project terminal) - Fix any basic errors if there are any (toolchain / path / library)
| Build result | Notes |
|---|---|
| Time for the first success | |
| Errors found (if any) and how you fixed them |
Pass when: the build succeeds with no errors
Part 4 — Flash to the Board
Section titled “Part 4 — Flash to the Board”- Plug in USB so KitProg is ready
- Program/Flash per the launch config or the command the documentation specifies
- Observe the result on the board (LED / behaviour per the example)
- If the example has UART: open a terminal at the baud rate per the guide, and record the message you get
Pass when: you see behaviour confirming the new firmware is running on the board
Part 5 — Debug Once
Section titled “Part 5 — Debug Once”- Set a breakpoint in
main, or a function that’s obvious in the example - Start a debug session
- Confirm it halts at the breakpoint, then resume/step at least once
Record:
- The configuration name used: _______________
- Halted at line/function: _______________
Pass when: debugging works for at least one round
Part 6 — Configuration Awareness (Light)
Section titled “Part 6 — Configuration Awareness (Light)”You don’t need to redesign the whole board — just open and look:
- Open the Device Configurator (
make device-configurator, or from the IDE) - Find the peripheral the example uses (such as GPIO for the LED, or UART)
- Open the Library Manager and look at the list of libraries the project has
Answer briefly:
- What is your BSP’s name?
- Name one library you see in the Library Manager
- If you chose the wrong BSP for the kit, what kind of problem would you risk?
Self-Check Guidance (Part 6)
Section titled “Self-Check Guidance (Part 6)”- It must match the real kit
- Examples such as retarget-io, or HAL/PDL/BSP packages the project pulled in
- Pins/devices won’t match the real thing — the LED/UART doesn’t work, or you program the wrong target
Common Misconceptions
Section titled “Common Misconceptions”| Misconception | How to fix it |
|---|---|
| Installing VS Code alone is enough | You also need ModusToolbox™ tools + the toolchain |
| Opening a random subfolder is the same as opening the workspace | Open the .code-workspace file the system created for you |
| A successful build = the firmware is already on the board | You still need a separate program/flash step |
Editing files in libs is always a good shortcut |
Use the Library Manager / app code as the main path |
Submission Checklist
Section titled “Submission Checklist”- Part 1’s machine check done
- A project created with the BSP matching the kit
- The build succeeded
- Flashed and saw the result on the board
- Debugging halted at least once
- Part 6’s questions all answered
Lesson · Cheatsheet · Table of Contents · M03 →
Cite this lesson
If you teach from this lesson or reuse it in slides or documents, credit it with the text below. If you changed it, add (adapted) after the title.
"Lab: Create, Build, Flash, and Debug a Firmware Project" from TESA Open Knowledge by the Thai Embedded Systems Association (TESA), https://github.com/tesaiot/tesa-qualification-program, licensed under CC BY-NC 4.0
Thai attribution: "แล็บ: สร้าง build flash และ debug โปรเจกต์เฟิร์มแวร์" จาก TESA Open Knowledge โดยสมาคมสมองกลฝังตัวไทย (Thai Embedded Systems Association: TESA) https://github.com/tesaiot/tesa-qualification-program สัญญาอนุญาต CC BY-NC 4.0
Lesson link: https://tesaiot.github.io/tesa-qualification-program/en/courses/firmware-sdk-edge-ai/m02-toolchain/l02-lab/
This lesson adapts the source below; keep its credit too.
https://github.com/drsanti/TESAIoT-Courses/blob/287c21814ba8c75f693136616dcd270349a15966/C1/M02/lab.md · Original content by Asst. Prof. Dr. Santi Nuratch (ผศ.ดร.สันติ นุราช), KMUTT. Course 1 (C1/) of drsanti/TESAIoT-Courses. TESA funded the work and holds the rights; published here under CC BY-NC 4.0. The upstream repository carries no licence file. Text kept faithful; structure, front matter, quizzes and notes added by TESA Open Knowledge.
TESA Open Knowledge · © 2026 สมาคมสมองกลฝังตัวไทย (TESA) · CC BY-NC 4.0
Content is licensed CC BY-NC 4.0. Reuse it non-commercially and credit the Thai Embedded Systems Association (TESA) every time. · How to cite TESA